Monday, February 24, 2014

MODERN CONVENIENCE french provincial 4 drawer dresser


George has loved this dresser for quite some time but alas,
if you love something you must set it free. 


It was painted in old white and distressed to give it more age than it actually has.


We had bought both this dresser and a matching desk,
when we moved in together.
The desk was painted and sold long ago, (stop pouting Elinor)


But in the last few months once it was clear it was going to have to find a new home
the dresser became another victim to Chalk Paint.


This dresser has pretty provincial handles and the modern convenience of roller drawers. 


You can find the side by side before and after here
Read More..

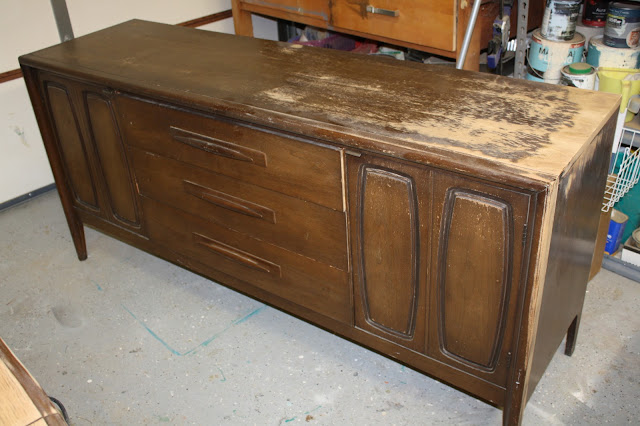
Sunday, February 23, 2014

On a MCM kick!

I picked up another credenza for a heck of a deal! This was made my Broyhill in the early 60s. 
The guy had been keeping it outside and had no idea what he had. 
This was located in a seedy part of town. So I took my pit-bull and a little something extra 
for protection ;)    (Im allowed to do that btw!)

There are so many on craigslist in the natural state, albeit refinished. They look great! But
they dont seem to sell that fast. I find that people like the ones that are painted.
Since this wasnt in pristine shape, I didnt feel so bad painting it. 
                     I chose gray and black for this one. I refinished the top in espresso.
I redid the drawers as well. Everything was a walnut veneer. Remember with veneers, go easy
when you sand, lest you hog all the veneer off!! Ask me how I know this......
  I love how the wood came out! This is a very masculine looking piece, quite 
different from what I usually do. 


Linking up at these great parties:

Restore Interiors - Restored it Wednesday
Kammys Korner - Trash to Treasure Tuesdays
Domestically Speaking - The Power of Paint Party
The Shabby Creek Cottage - Transformation Thursday
Miss Mustardseed - Furniture Feature Friday
Redoux - Friday Link Up Party
Homespun Happenings - Rustic Restorations Weekend
Funky Junk Interiors - Saturday Night Special
1929 Charmer - Sundays Best Party
Knick of Time Interiors - Knick of Time Tuesday
Elizabeth and Co., My uncommon Slice of Suburbia,
Savvy Southern Style. Weds, Beyond the Picket Fence, PJH Designs
From my Front Porch to Yours,  
Between Naps on the Porch, Catch as Catch Can , The Dedicated House, Redoux

Read More..

GREAT TURN OUT yard sale day 1

Regardless of the rain we had a good turn out today at our yard sale.


George has decided we are going to open again tomorrow as we still have great pieces left.
Like this french provincial stereo cabinet. In the right hands you can recreate this:


How about a driftwood bench to make a fun space in your garden with a little stool beside.


This driftwood table could be your next potting bench


BELOW is the perfect result for the above $20 tall boy.


How about styling this vintage vanity above into this chic look below.


Heres a great and simple upholstery project perfect for a make up vanity, with great storage.


How about practising your hand painting on this white vanity below.


So come on out to get a great project piece for cheap dollars.

YARD SALE IS NOW CLOSED THANK YOU ALL!!
Read More..

WATCH CAREFULLY cafe cabinets


I have done so many bedside tables I cant count,
is this an addiction or just something Ive become good at?
 
 
I know they are very useful and I have learned they can be transformed dramatically.
Scroll slowly back and forth through the next photos to watch the changes that are possible.


FIRSTFINDS UPDATE:
 
Here are just a few of the new items available in Firstfinds Etsy store
stop in to see if there is a treasure for you.


Read More..

Saturday, February 22, 2014

1 Free Woodworking Catalog Woodworking Plans

Free Woodworking Catalog

Woodworking Plans

Do-it-Yourself Patterns and Crafts, Woodworking kits, Furniture Plans Plus Much, Much More. Will Show You How to Make 16,000 Different Woodworking Plans. Use The Plans For Fun, Functionality or Profit!

Free Woodworking Catalog. Wood is 1 of the most beautiful, durable and versatile components that you can work with when on a do it oneself project. The beauty of a cabinet door that is completed in wood can not be matched by any other material irrespective of whether all-natural or man created. As with any project, you would require a detailed set of plans even though you function with wood and wood based materials. This is why it is suggested that you use a detailed set of woodworking plans after you plan to extensively use wood based materials to full the project that you have embarked on.

Now let us examine why woodworking plans are vital in any wood based do it oneself project. To begin with, these plans assistance you eradicate waste. If you start a woodworking project with no a firm plan, the probabilities are that you would finish up working with much more wood that you originally intended to. Most of the wood based projects would require comprehensive assemblies and sub assemblies.

When you commence your project, you would be ideally working with person members of wood and finishing them individually just before assembling them. If you do not have the suitable woodwork plans, you could end up with mismatching wood members at the time of assembly. This could result in pricey cost and time overruns in the project. All these complications can be avoided by using a well laid out set of wood plans.

The other advantage that you could have if you use woodworking plans are that you would be ready with all the tools and implements that you would require for completing the wood primarily based project. Frequently we come across that we do not have access to a specific tool in the middle of a woodworking project. This predicament could lead to a loss of time and occasionally you might even have to abandon the project in case a unique tool is not accessible. All these concerns can be avoided if you have a detailed plan at the onset. Free Woodworking Catalog


Free Woodworking Catalog Data

Constant Advertising - The romance of woodworking will need to have to be balanced with the constant marketing and marketing essential to retain the operate coming in. In time, phrase of mouth brings in a lot of operate if you create a fantastic reputation. Till finally then, you will will need to get the phrase out routinely. Soon after the work arrives in you have to have fantastic manufacturing systems so you can total the tasks promptly and continue to maintain the money flowing. If jobs take into consideration also really long and the dollars movement stops, it can turn into tricky to shell out the costs. Speaking of revenue flow, you should really create and adhere to standard assortment techniques. This is 1 area where by various woodworkers fail. The payment for the carry out will require to be as crucial as the perform by itself. If you are lax in accumulating, you will run into prospects who fall brief to shell out you and this will result in truly critical earnings movement troubles.

The Modest organization - Even nonetheless you like woodworking, you will will need to do the house small business if you are to make a dwelling at it. Superior outcomes ordinarily calls for an in-depth details of each woodworking and business enterprise management. If you by no means have every, I recommend you hesitate to leap in until you have honed your enterprise capabilities.

Seeking back once more I recognize that my lack of know-how in the course of my startup really a handful of decades back could have been offset with some popular details and a further person to advise me.Sadly I had to understand most components by trial and error.

Just about every single and each and every and every week, I take the time to go via the comments that my viewers make about my woodworking web site. 1st of all I want to them for taking the time to comment, I surely value all of the comments and tips. This preceding week there was a comment from a gentleman, who expressed a need to get into woodworking. As a man who is passionate about woodworking, I want to welcome him to the fold. And I want to give you him all of the ideas and encouragement probable in his endeavors.Free Woodworking Catalog


More Free Woodworking Catalog Clip :


Tag : How About Free Woodworking Catalog, How To Get Rid Off Free Woodworking Catalog, Best for Free Woodworking Catalog, Where Can I Find Free Woodworking Catalog, Buying Free Woodworking Catalog.

Free Woodworking Catalog Reviewed by Ronald Redden on Rating: 5
Read More..

Quote Garden Ideas


Tuinbord – Garden quotegarden sign
Tuinbord – Garden quote
Tuinbord – Garden quote – garden sign
Great Ideas for the Garden
Tuinbord - Garden quote - garden sign. 3 likes 7 repins
Great Ideas for the Garden
Read More..

Simple Contemporary Black Nightstand Plans

Free DIY plans to build your own sleek, black, contemporary nightstand with three drawers to help keep your bedside clutter at bay. Features big, recessed, stainless steel lift handles for drawer pulls.

This black, closed nightstand has contemporary styling. Three large drawers provide storage for convenient items youd like to have near your bed such as reading glasses, books, magazines as well as clothes storage for items that dont fit in your dresser. They make great sock and underwear drawers or storage for your pajamas and other sleepwear.

The recessed lift handles help to give it more of an industrial look. For the sailor the handles will bring back a feeling of being out cruising as they are typical of handles used on boats. You can choose to install one or two handles per drawer depending on the look youre after.

Dimensions

Dimensions: 20 1/2"W x 24"H x 17"D

What Youll Need

Materials

  • (2) 3/4" Plywood 2 x 4 (Carcass)
  • (1) 1/2" Plywood 2 x 4 (Drawer Boxes)
  • (1) 1/4" Plywood 2 x 4 (Drawer Bottoms)
  • (1) 2x2 Board
  • (1) 1x2 6 Board
  • (1) 1x3 8 Board
  • (1) 1x8 6 Board (Drawer Fronts)
  • (15) 3/4" Veneer Edgebanding
  • (3) Recessed Drawer Pulls
  • (3) Drawer Slides (pairs)
  • Assorted Sandpaper
  • Primer and Paint (or pre-stain, stain and finish coat)

Tools

  • Drill and assorted bits
  • Miter Box or Miter Saw
  • Circular saw with guide, track saw or table saw
  • Kreg Jig
  • Chisels
  • Hammer
  • Iron (for edgebanding)
  • Measuring tape
  • Pencil
  • Screwdriver
  • Utility knife
  • Sanding block or finish sander
  • Painting supplies
Make sure you understand how to use all the tools properly and follow all safety precautions.

Cut-List

  • (2) 15 5/8" x 22 1/4" Sides (3/4" Ply)
  • (1) 18 1/2" x 22 1/4" Back (3/4" Ply)
  • (1) 14 1/2" x 18 1/2" Bottom (3/4" Ply)
  • (1) 12" x 15 1/2" Top (3/4" Ply)
  • (4) 18 1/2" x 4" Stretchers (3/4" Ply)
  • (6) 4 1/2" x 17 5/8" Drawer Box Front/Back (1/2" Ply)
  • (6) 4 1/2" x 12" Drawer Box Sides (1/2" Ply)
  • (3) 12 3/8" x 17" Drawer Bottoms (1/4" Ply)
  • (4) 1" Feet (2x2)
  • (2) 17" Base Front/Back * (1x2)
  • (2) 13" Base Sides (1x2)
  • (2) 20 1/2" Top Edge Front/Back (1x3)
  • (2) 17" Top Edge Sides (1x3)
* Some drawer slides may require a different size drawer box. Check the specs for your slides to determine the width of the drawer box.

Cut Plan

Plywood

Buy Online, Pick Up in Store. Now available at a H
The plan calls for using 2 x 4 (quarter) sheets of plywood. If you plan on making 2 nightstands you can save a little bit of money by buying 1 full sheet of the 3/4" plywood. If you dont have an easy way to transport such a large sheet you might still want to go with 2 x 4 sheets because theyre easier to transport. Home Depot has a few different species of 2 x 4 PureBond hardwood veneered plywood available on their website which are eligible for free shipping. Takes all the hassle out of buying plywood. Click the image on the right to explore their options in their lumber department. The PureBond plywood is made by Columbia Forest Products using Soy Based adhesives and is formaldehyde free.

Note on Edgebanding: Depending on the thickness of the edgebanding you use, you may need to cut some of the pieces a little smaller to accommodate. The kraft paper backed Edgemate edgebanding is only .022" (~ 3/128) thick which is too think to account for in a piece like this.

3/4" Plywood

Whether youre painting or staining your nightstand some of the grain texture will still show through so its important to get plywood that has a nice grain structure such as red oak, maple, walnut, cherry, etc.

1/2" Plywood

A good choice for the drawer boxes is 1/2" maple plywood. HomeDepot.com offers PureBond 1/2 in. x 2 ft. x 4 ft. Maple Plywood at an affordable price which is currently eligible for free shipping.


If you dont have a table saw or router: it might be easier to make the rabbet cuts (discussed bellow in more detail) before you cut out the drawer box sides using a guide and a circular saw. That way the rabbets will line up perfectly on  at least 3 of the sides.

1/4" Plywood

The 1/4" Plywood is used for the drawer bottoms. Any 1/4" plywood (not MDF) will do such as PureBond 1/2 in. x 2 ft. x 4 ft. Maple Plywood.

Boards

All of the boards below should be of a wood that matches the species of the plywood youre using for the nightstand carcass. This is especially true if youre planing on staining the nightstand. Its a little less important if youre going to paint the cabinet, which is recommended for getting an even black finish, but still best to get the same species. 

2x2

You only need about 4" but get at least 12" so you have something to hold onto while making the cuts.  Actual dimensions will be 1 1/2" x 1 1/2". Board should be S4S (surfaced 4 sides). These will make up the legs of the nightstand. Use a stop-block on your miter saw to ensure all pieces are the same height. If youd like to increase the size of your nightstand you can make these legs longer.

1x2

Actual dimensions are 3/4" x 1 1/2". This will be the apron around the base of the nightstand, between the legs.

1x3

These pieces will form the edge around the nightstand top to give it a nicer look. Actual dimensions are 3/4" x 2.5".

1x8

The 1x8s make up the drawer fronts. An appearance grade S4S board in a species that matches your 3/4" plywood. Actual dimensions will be 3/4" x 7.25".

Step 1

Begin by cutting out the 3/4" Plywood pieces for the Sides, Back, Bottom and Stretchers of the nightstand. The cut plan assumes the direction of the grain is running along the long end of the plywood boards. The plan calls for the grain on the sides to run up/down. The grain direction for the back and bottom arent as important since they wont be seen. If the grain on your plywood runs in a different direction or youd like to have the grain running in a different direction on your nightstand, make the appropriate changes to your cut plan.

It is important that the bottom piece is 3/4" shorter than the width of the sides (before applying edgebanding) so that the drawer fronts fit flush.

Step 2

Drill all pocket holes as shown and attach the veneer edgebanding to the front of the bottom piece. Attach the bottom piece to the back as shown using wood glue and 1-1/4" coarse thread pan head screws.

Step 3

Drill 1 or 2 pocket holes on the inside top middle of each side panel to attach the top later. Apply edgebanding to the front and back of the side pieces. Then screw the sides to the bottom and back using wood glue and 1-1/4" coarse thread Maxi-Loc head pocket hole screws in the holes previously drilled on the back and bottom.

Step 4

The 4 stretchers should be the same width as the back and bottom pieces to hold the cabinet carcass square.  Apply edgebanding to the front of 3 of the 4 stretchers that will be installed in the front of the nightstand. Recheck for square and attach the stretchers as shown using 1-1/4" coarse thread Maxi-Loc screws and wood glue.

Step 5

Temporarily attach the cabinet side half of the drawer glides to the cabinet following the specifications for the slides you purchased. You will need to remove and replace them when painting the cabinet but its much easier to mark and align them before the top goes on.

Step 6

Cut and assemble the pieces for the top of the nightstand making sure its square. The mitered 1x3s are cut to 2 different lengths. The top should be 1/2" wider and 1" deeper than the nightstand carcass. Use wood glue and 1-1/4" pocket hole screws.


Hint: Its best to cut the mitered boards after you cut the plywood and cut them a little longer than necessary. Cut them back after dry fitting them around the plywood top. Its important that the 2 pairs of boards are the same length to get a tight mitered corners. Cut one board, then cut just one side of the next board and stack the two together on top of your miter saw and use the first piece to help guide the cut.

Align the top with the nightstand. It should be flush with the back, overhang 1/4" on each side and 1" at the front. Secure the top with wood glue and 1-1/4" pocket hole screws from the sides of the cabinet and 1-1/4"  countersunk wood screws from the stretchers up into the top.

The Bosch Clic-Change 7-Piece Phillips Bit and Countersinking Set will drill the pilot holes and countersinks at the same time. The set doesnt come with the Clic-Change chuck but the bits will fit in a normal chuck. You just wont get the quick change feature. 

Step 7

Cut and assemble the base components so they will be flush with the bottom of the back and sides of the carcass. Use 1-1/4" fine thread Maxi-Loc head screws for the pocket holes and wood glue for the base. To attach the base to the cabinet use wood glue and pre-drill and countersink for 1-1/4" wood fine thread wood screws from the 1x2 pieces up into the carcass.

Step 8

Before cutting the pieces for the drawer boxes, measure the actual width or the nightstand opening and the actual width of your 1/2" plywood. The drawer slides need to be aligned well and the cabinet square for them to operate effectively. Make any corrections necessary when building your drawer boxes.

You will need to cut a 1/4" x 1/4" rabbet 1/2" up from the bottom of all the drawer box sides. If you have a router with a guide or router table or a table saw this is very easy but you can also cut the rabbet out with a circular saw set at only 1/4" deep and a cutting guide.. You might need to make 2 passes. Cut a test rabbit in some scrap wood to make sure youre not cutting too deep and make sure the 1/4" plywood edge will fit in the groove.

When using a circular saw I find it best to cut rabbets first, then cut out the 4.5" strips across the entire length of the plywood. Finally I trim the long strips to the right width using a miter saw.

Dry fit the drawer boxes to make sure they fit together right and square. Double check the measurements to make sure it will leave the required space on each side of for the drawer slides (usually 1/2").

Once youre ready, drill 4 pocket holes on the front and back pieces (opposite the side with the rabbet). Dont forge to adjust your Kreg Jig and drill bit for the 1/2" material. Glue and screw 3 of the sides using 1" coarse threaded screws. Slide the 1/4" drawer bottom into the groove but do not glue it. If the 1/4" plywood is slightly bowed (which happens frequently with this thin plywood) try to flatten it out and slide it in with the crown side up. Finally glue and screw the 4th piece to complete the drawer.


If you have a router give the top edges of the drawer a slight round over, otherwise use a file or sander to knock down the edges of the plywood a bit. Or you can cover them with 1/2" maple edgebanding.

Step 9

Attach the other halves of the drawer glides to the drawer boxes according to the drawer glide specs and make sure they work properly.

Step 10

Measure and cut the 1 x 8 board (should be 3/4" x 7 1/4" actual dimensions) for your drawer fronts. Cut them 1/4" shorter than the actual width of your cabinet opening so that there is a 1/8" gap between the sides of the cabinet and the drawer front on each side. Use shims to position the drawer fronts to make sure everything looks fine before continuing. 

Step 11

The lift handles used for drawer pulls need to be recessed into the drawer fronts. Measure and mark the positions on all three drawer fronts. Double check to make sure they all line up, then cut out the recess using either a router or a hammer and chisel.  Use a sharp utility knife to carefully score around the area that needs to be removed to help prevent chipping and splintering.

Step 12

Use double sided tape on the drawer fronts. Starting with the bottom drawer place the drawer front on the drawer box where youd like it, using shims to get the spacing correct, then press it against the tape to temporarily hold it in place. Repeat for the remaining drawers. Carefully slide the shims between the top and middle drawer out and slide out the top drawer. Drive 4 1" round head wood screws from the inside of the drawer box into the back of the drawer front at the corners to secure it in place. Repeat for the remaining drawer fronts.

Finishing

You can leave the drawer boxes unfinished but 2 coats of a water based finish such as Minwax Water-Based Wipe-On Poly will help seal and protect them.

For the rest of the nightstand you have two options. You can either paint it black or use a black stain. Staining is a little more difficult and time consuming and it can be difficult to get the black stain to look exactly how some people like. Black paint will still allow some of the texture of the wood to show through but wont be as pronounced as staining. Painting will provide a more even color.

Staining Black

Sand and clean the entire nightstand. Apply a pre stain wood conditioner followed by 3-4 coats of a black wood stain such as Minwax Ebony Wood Stain. Finally finish with a water based satin polyurethane.

Painting Black

Sand and clean the entire nightstand and brush on a good quality primer such as Kilz Odorless Interior Oil Based Sealer Primer, Zinsser Cover Stain Primer Sealer, or my favorite Zinsser B-I-N Shellac Base Primer & Sealer. After the primer has dried, lightly sand with 220 grit sandpaper.

Follow up with 2 coats of a good black paint such as Benjamin Moores Aura in satin finish or for a stronger finish Rustoleum Satin Black Protective Enamel Oil Base Paint.
Read More..